📗 목차
1. 프로젝트 생성
사전 준비물
- Java 11 설치
- IDE: IntelliJ 또는 Eclipse 설치
스프링 프로젝트 생성
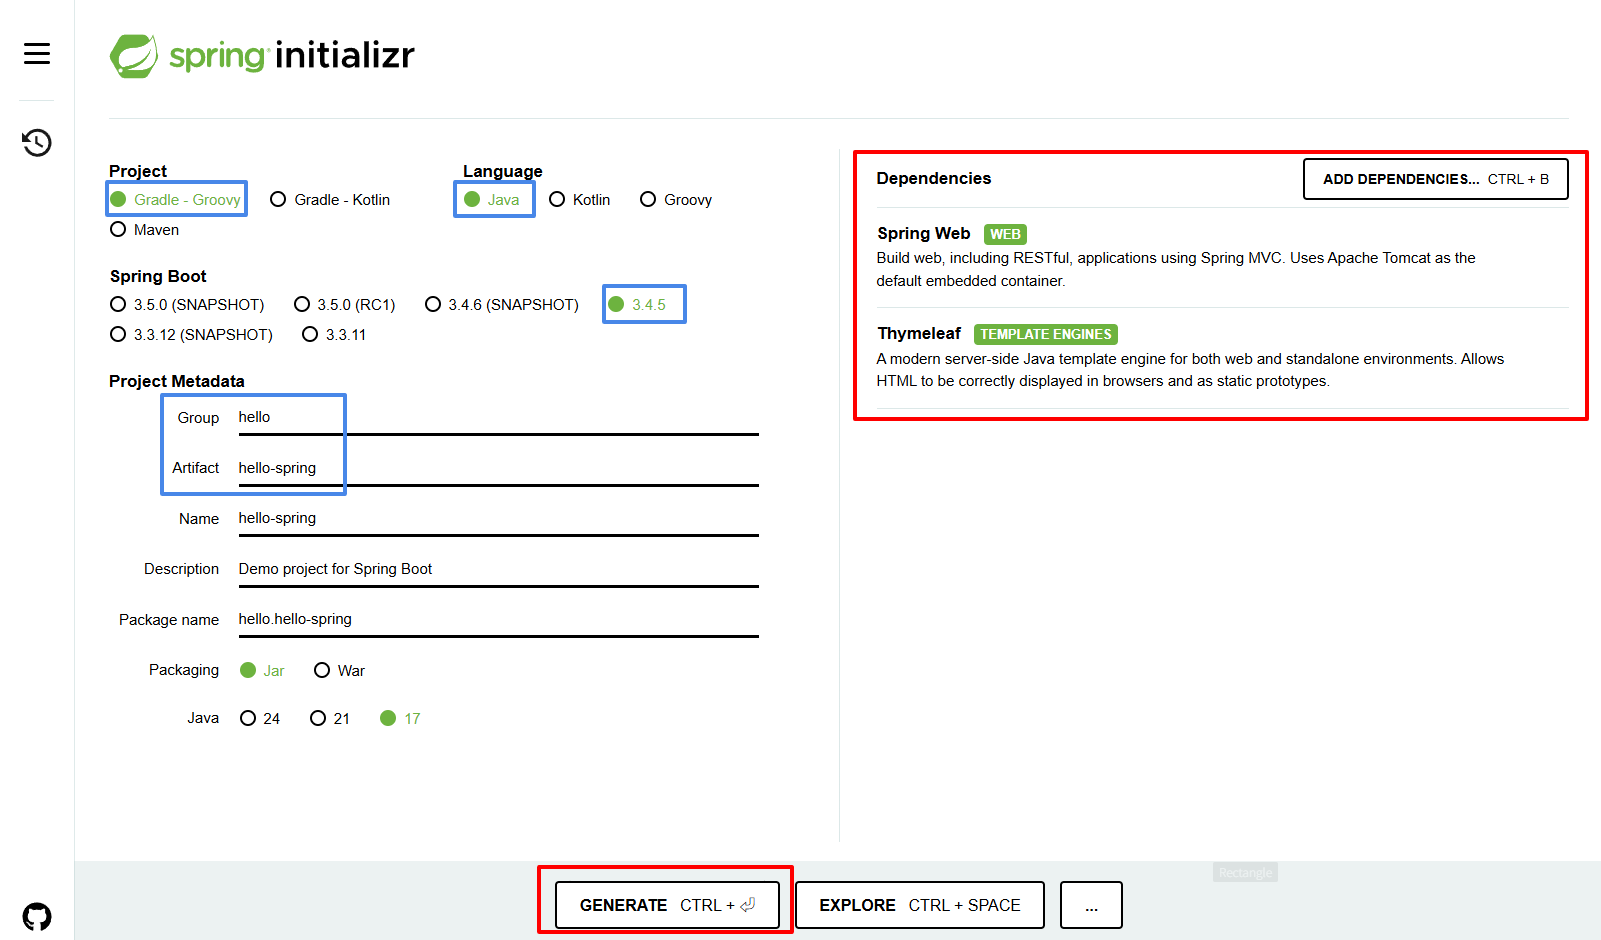
- 스프링 부트 스타터 사이트: https://start.spring.io/
- 설정
- Project: Gradle-Groovy
- Language: Java
- Spring Boot: 기본값 (강의는 Sping Boot 2.3.1 버전을 사용한다.)
- Project Metadata: Group, Artifact 지정
- Dependancies: Spring Web, Tymeleaf 추가
- GENERATE: 누르면 압축파일이 다운로드 된다.

압축 풀고, IntelliJ 로 폴더 열기

폴더 구조 설명
project-root/
├── build.gradle         # Gradle 빌드 설정 파일
├── settings.gradle      # (멀티모듈일 경우) 프로젝트 설정
├── src/
│   ├── main/
│   │   ├── java/               # Java 소스코드 (ex: com/example/project)
│   │   └── resources/          # 설정 파일 및 정적 리소스
│   │       ├── application.yml  # Spring 설정 파일 (또는 application.properties)
│   │       └── static/         # 정적 파일(css, js, img)
│   │       └── templates/      # Thymeleaf, Mustache 등 템플릿 엔진 파일
│   └── test/
│       ├── java/               # 테스트 코드
│       └── resources/          # 테스트 관련 설정 및 리소스
프로그램 실행

2. 라이브러리 살펴보기
* Gradle은 의존관계가 있는 라이브러리를 함께 다운로드 한다
스프링 부트 라이브러리
- spring-boot-starter-web
- spring-boot-starter-tomcat: 톰캣 (웹서버)
- spring-webmvc: 스프링 웹 MVC
- spring-boot-starter-thymeleaf: 타임리프 템플릿 엔진(View)
- spring-boot-starter(공통): 스프링 부트 + 스프링 코어 + 로깅
- spring-boot
- spring-core
- spring-boot-starter-logging
- logback, slf4j
- spring-boot
테스트 라이브러리
- spring-boot-starter-test
- junit: 테스트 프레임워크
- mockito: 목 라이브러리
- assertj: 테스트 코드를 좀 더 편하게 작성하게 도와주는 라이브러리
- spring-test: 스프링 통합 테스트 지원
3. View 환경설정
Welcome Page 만들기
<!-- resources/static/index.html -->
<!doctype html>
<html lang="ko">
<head>
    <meta charset="UTF-8">
    <meta name="viewport" content="width=device-width, initial-scale=1">
    <title>Hello</title>
</head>
<body>
Hello
<a href="/hello">hello</a>
</body>
</html>
hello 페이지 만들기
- thymeleaf 템플릿 엔진 사용
@Controller
public class HelloController {
    @GetMapping("hello")
        public String hello(Model model) {
        model.addAttribute("data", "hello!!");
        return "hello";
    }
}
<!-- resources/templates/hello.html -->
<!DOCTYPE HTML>
<html xmlns:th="http://www.thymeleaf.org" lang="ko">
<head>
<title>Hello</title>
<meta http-equiv="Content-Type" content="text/html; charset=UTF-8" />
</head>
<body>
<p th:text="'안녕하세요. ' + ${data}" >안녕하세요. 손님</p>
</body>
</html>
템플릿 엔진 동작 환경

4. 빌드하고 실행하기
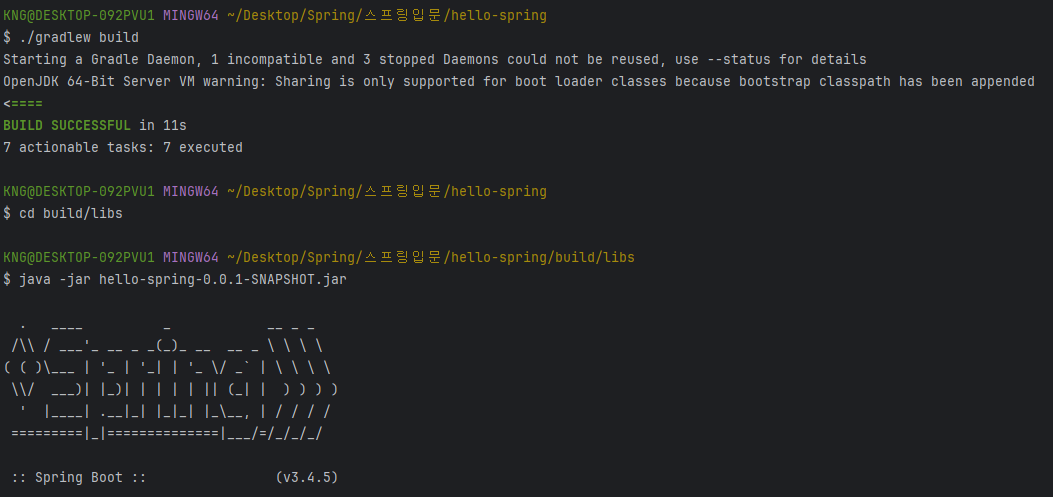
* Git bash 터미널 사용
./gradlew build
cd build/libs
java -jar hello-spring-0.0.1-SNAPSHOT.jar
5. [퀴즈]
1. start.spring.io는 주로 어떤 목적으로 사용될까요?
- 웹 페이지 디자인
- Spring Boot 프로젝트 생성
- 데이터베이스 관리
- 서버 하드웨어 설정
2. Spring 프로젝트에서 Gradle 같은 빌드 도구의 주요 역할은 무엇일까요?
- 소스 코드 편집
- 의존성 관리 및 빌드 자동화
- UI/UX 디자인
- 최종 사용자 테스트 수행
3. Spring Boot의 'Starter' 의존성은 어떤 점을 간소화해주나요?
- 코드 복사/붙여넣기
- 관련 라이브러리 자동 포함 및 설정
- 개발자 개인 설정
- 애플리케이션 실행 방식 변경
4. Spring Boot에 Tomcat 같은 내장 웹 서버가 포함되어 있어서 좋은 점은 무엇일까요?
- 개발 비용 절감
- 별도 웹 서버 설치 불필요
- 애플리케이션 속도 향상
- 데이터베이스 연결 자동화
5. 개발 시 System.out.println 대신 로깅 프레임워크를 사용하는 주된 이유는 무엇일까요?
- 코드 길이 단축
- 다양한 로그 레벨 및 파일 관리 용이
- 실행 속도 향상
- 보안 취약점 감소
'Spring > 강의' 카테고리의 다른 글
| [📙 숙련 Spring] 1-1. 객체 지향과 Spring 핵심 개념 (0) | 2025.05.15 |
|---|---|
| [📗 스프링 입문] 2. 스프링 웹 개발 기초 (1) | 2025.05.08 |
| [📗 스프링 입문] 코드로 배우는 스프링 부트, 웹 MVC, DB 접근 기술 (0) | 2025.05.07 |
| [📕 기초 Spring] 6-7. 메모장 프로젝트 - ver4 (데이터베이스 접근 기술 적용) (0) | 2025.05.07 |
| [📕 기초 Spring] 6-6. Java와 Database (0) | 2025.05.06 |